
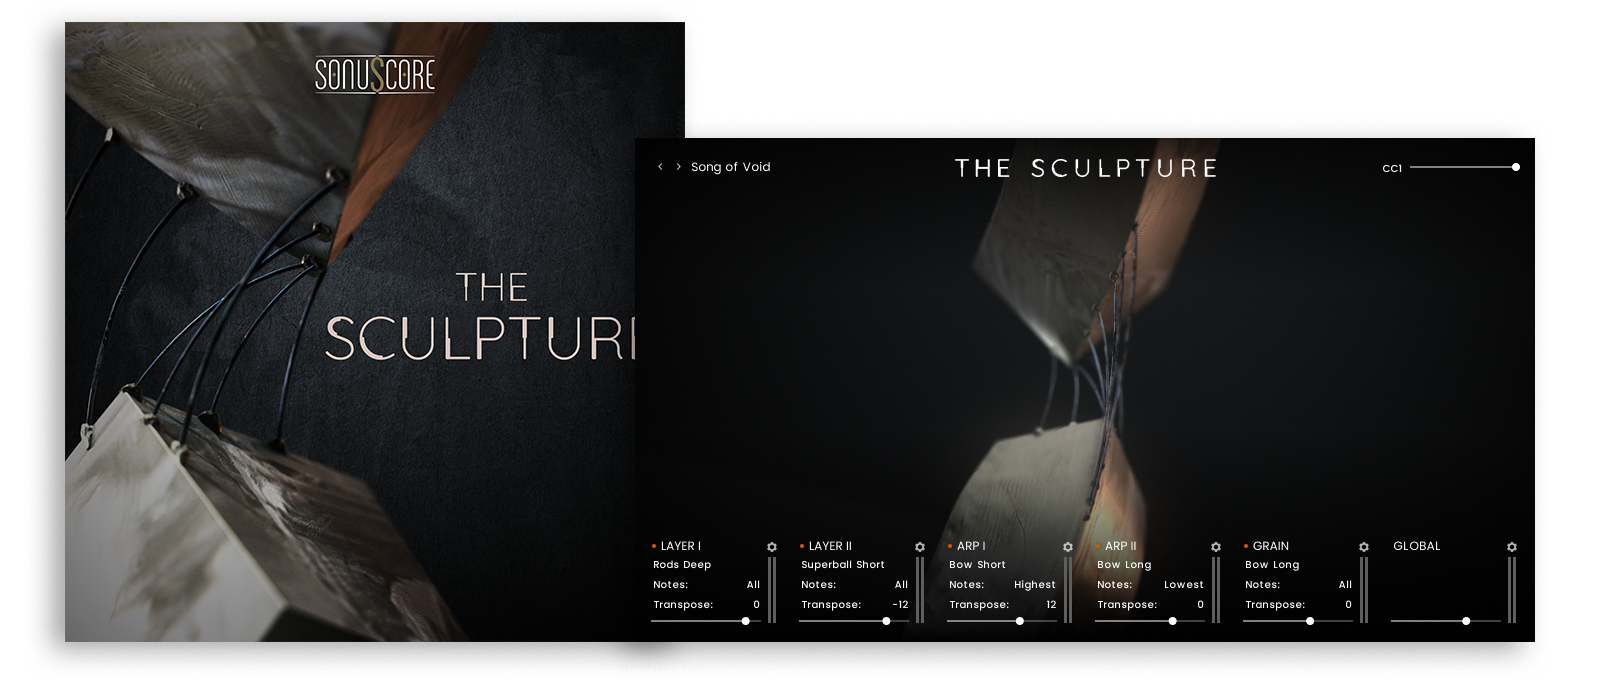
MANUAL
Document Version 1.0.0
Product Version 1.0.0
© by SONUSCORE
SYSTEM REQUIREMENTS
For latest system requirements, please visit www.sonuscore.com, or your trusted dealer's website.
Welcome to The Sculpture
Thank you very much for choosing Sonuscore software.
Congratulations on your brand-new instrument The Sculpture by Sonuscore. We hope you will enjoy this instrument as much as we do. This manual will help you to get started and explains the features and functions of your new software.
The Sculpture is a metallic sound design instrument built from one object. Every sound comes from a single multi-cut metal sound sculpture, a resonant structure recorded in close detail and turned into a playable instrument for the free Kontakt Player.
Struck, bowed, scraped, and set ringing, it produces signature sounds including haunting drones, shimmering strikes, ethereal resonances, and metallic pulses that shift from delicate ambience to raw impact. The Sculpture covers a range that most metal instruments never reach.
To gain a deeper understanding of all this instrument's possibilities, be sure to also check out our tutorials and walkthroughs.
Best regards and enjoy,
Sonuscore
The Sculptor
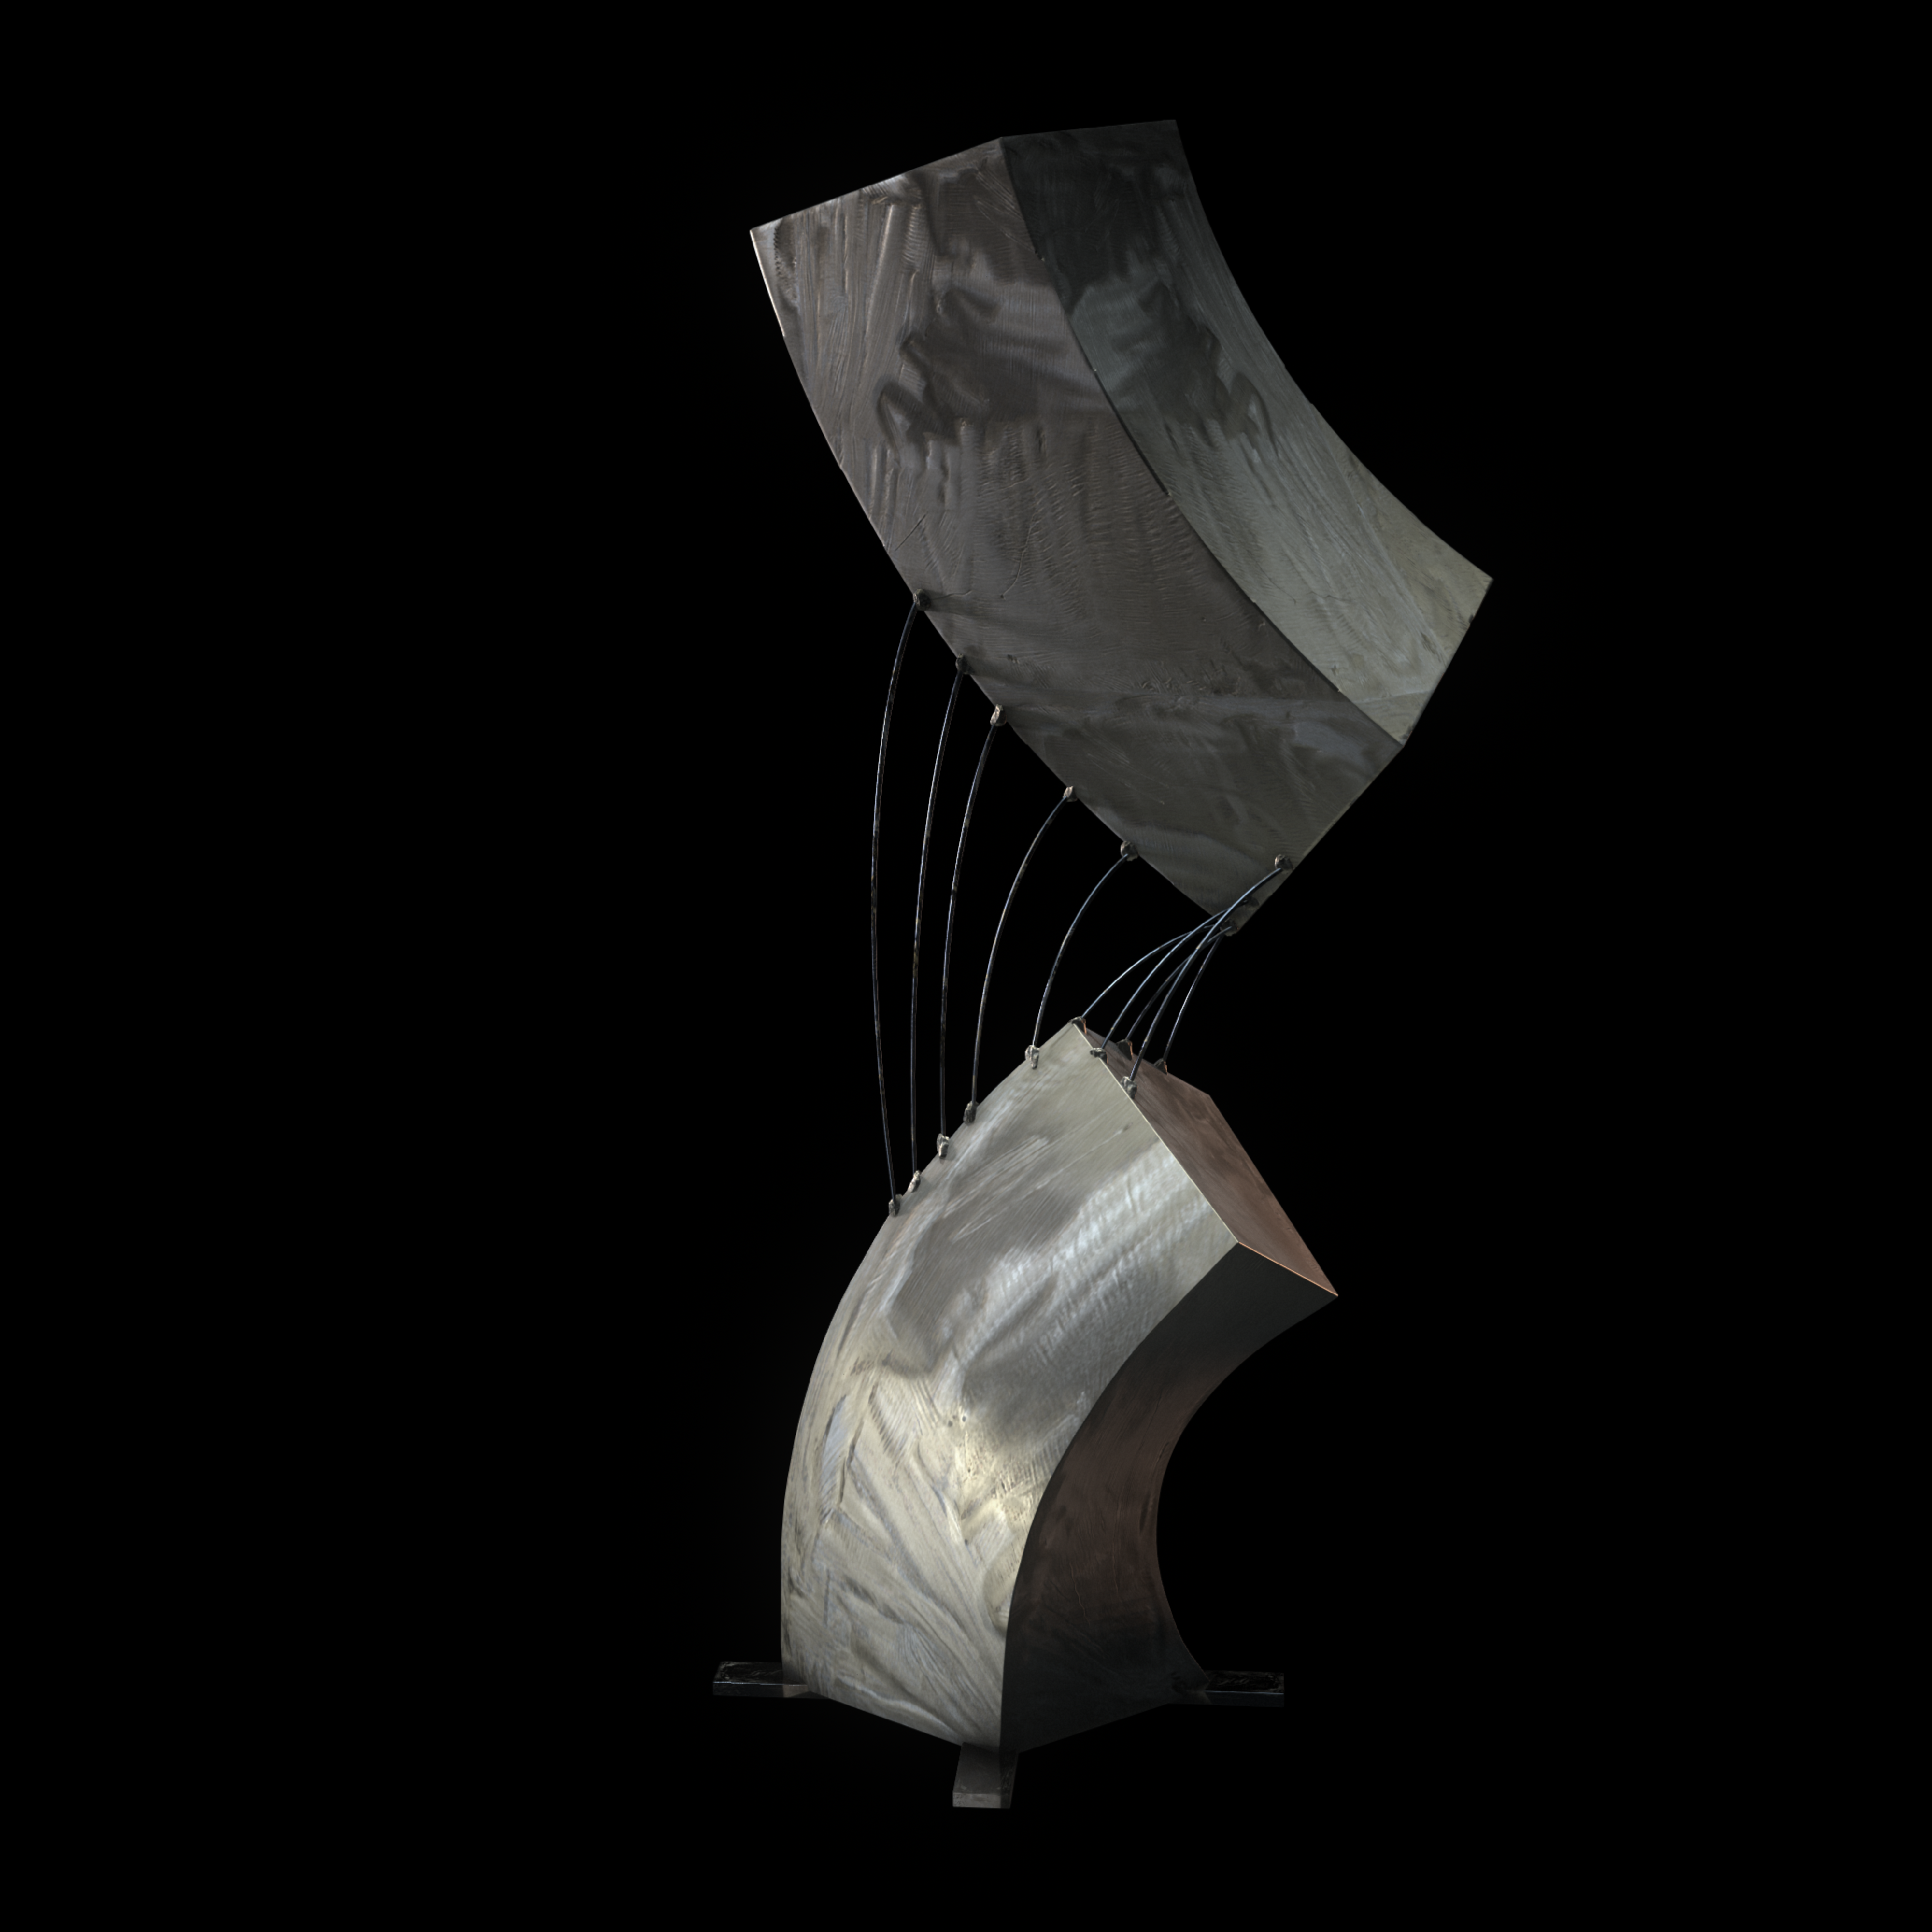
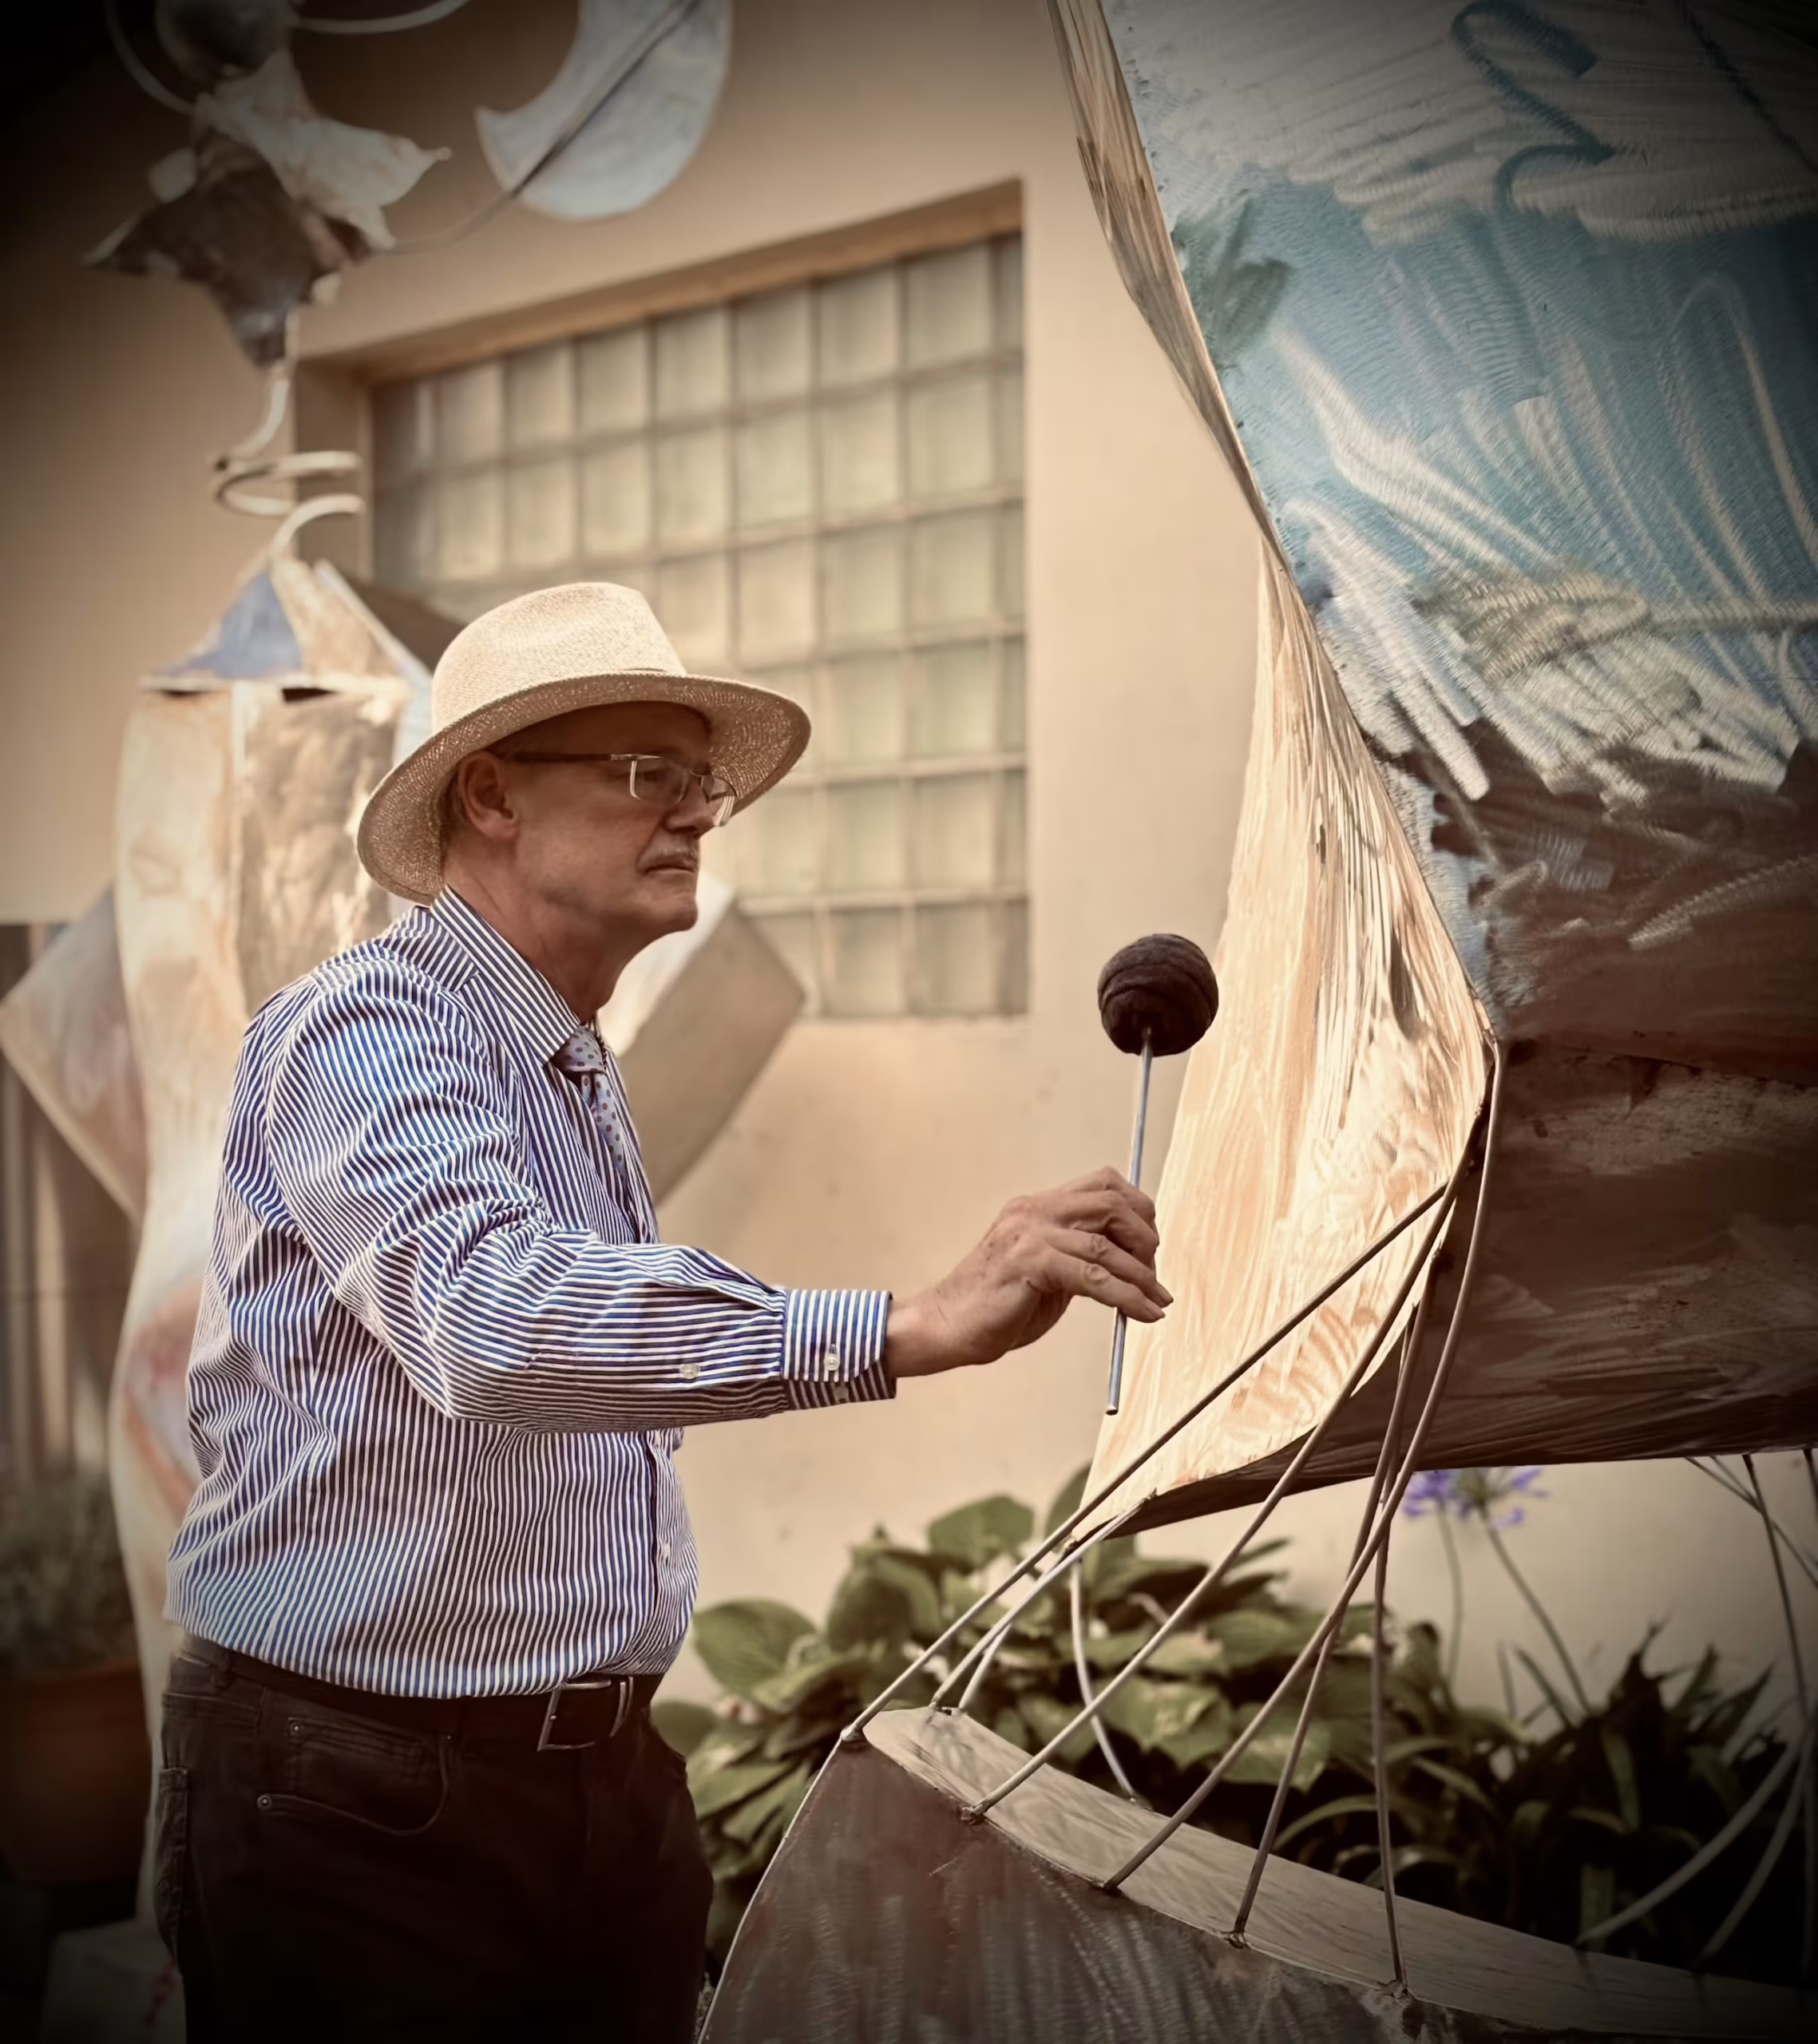
Sculptor Klaus Gündchen has spent decades exploring the universality of the harmonic laws that shape and hold the world together, from the smallest elementary particles to the largest structures of planetary systems and galaxy clusters. Inspired by the Platonic and Archimedean solids and the Golden Ratio, he creates impressive stainless steel sculptures.
He discovered early on the acoustic properties of his sculptures, which follow the same harmonic laws, thereby becoming unique musical instruments.
Since the 1990s, his works have been exhibited internationally and played as instruments in numerous concerts.
SETUP
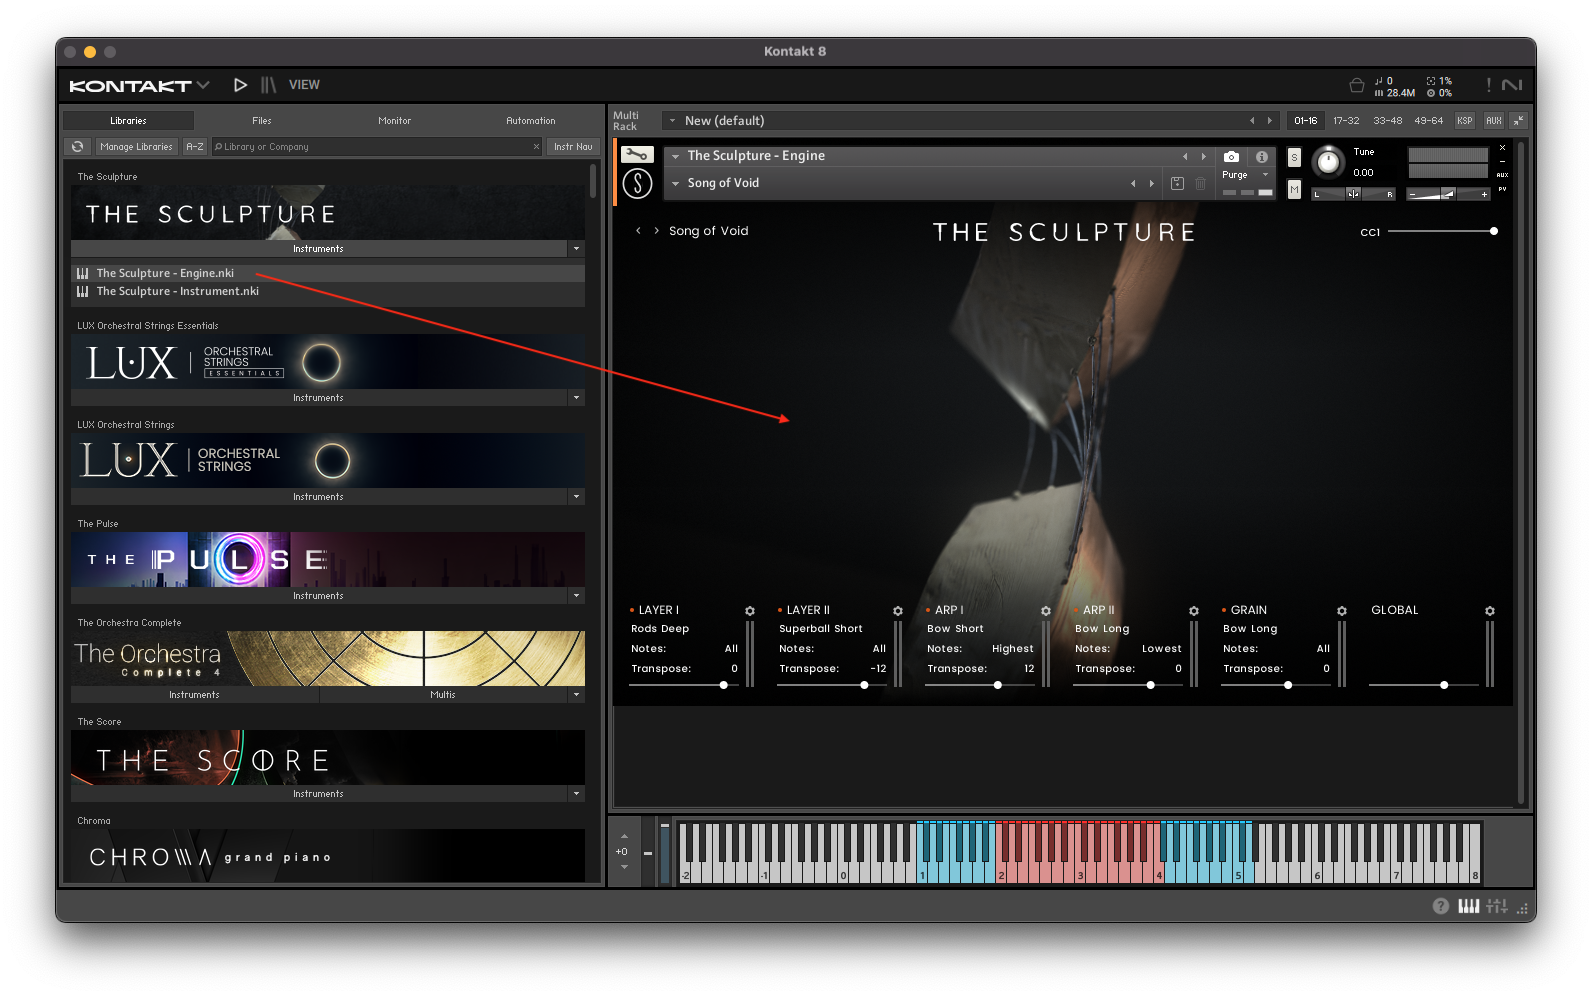
Loading The Sculpture via KONTAKT
The Sculpture is not an independent plug-in, so you will first need to open an instance of Native Instrument's free KONTAKT PLAYER before you can start playing.
- 1. Download and install Native Instrument’s FREE KONTAKT PLAYER.
- 2. Open KONTAKT PLAYER as a plug-in in your host software (DAW), or as a stand-alone application.
- 3. Click "Library" at the top.
 If you don't see the Libraries Browser to the left, click "view" and select "classic view".
 Locate The Sculpture in the Browser, on the left side of the user interface.
 - 4. Click Instruments to open the product’s content.
- 5. Double-click for example the The Sculpture - Engine.nki file, or drag the .nki to the open space to the right, to load the instrument.
Articulations
The Sculpture contains both short and long articulations. Sampled with various mallets, rods, brushes and bows from the different sufaces and materials of the sculpture.
Shorts
- Plate Bram
- Plate Dark
- Plate Metal
- Plate FX Scrape
- Plate Brush FX
- Rods Rubber
- Rods Deep
- Rods Finger
- Rods Thin
- Rods Hard Mallet
- Rods Soft Mallet
- Rods Medium
- Rods Big
- Rods Metal Mallet
- Bow FX
- Bow Long
- Bow Phrases
- Bow Poly
- Bow Short
- Superball Phrases
- Superball Short
Longs
- Plate Rolls
- Plate Rolls FX
- Plate Rolls Brush
- Rods Rolls Deep
- Rods Rolls Thin
- Rods Rolls Soft
THE SCULPTURE - ENGINE
MAIN PAGE
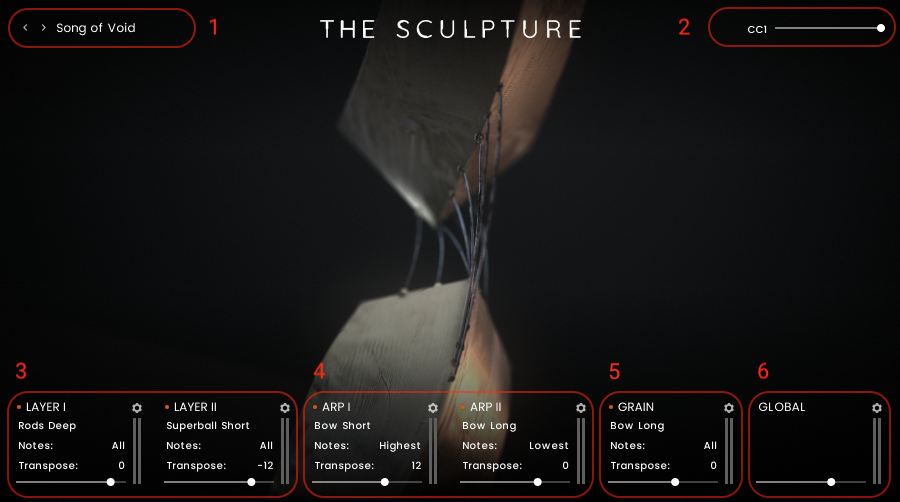
- Click the preset name to enter the preset browser or click on one of the arrows to skip through the presets. See 5.6.
- Shows the current value of the mod wheel (CC01).
- LAYER I and LAYER II can load any of the articulations. You can change the articulations for both slots, add FX to noth slots independently, adjust the note selection and transpose the playing range on the keyboard up or down. For more detailed information please see 5.2.
- ARP I and ARP II can only load the short articulations.
- The GRAIN engine can load all articulations.
- Adjust the GLOBAL volume and enter the GLOBAL FX menu.
The Sculpture has a delay of -50 ms. Set your track delay to this value and The Sculpture will be perfectly in sync with your other instruments.
Please refer to the relevant documentation for the necessary steps to set a track delay in your digital audio workstation.
The Sculpture - Engine offers five slots for a variety of sonic possibilities. Please continue reading to find out more about each engine part.
Layer I & II, Arp I & II and Grain share the same structure of controls on the main page:
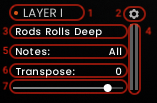
- Slotname. Clicking the slotname or the orange knob in front will mute/un-mute the slot.
- Clicking the cog wheel opens the corresponding edit page. See 5.2. - 5.5.
- Shows the currently loaded articulation.
- Note Selection: The slots only reacts to highest, middle or lowest note of the played chord.
- Volume-Meter for this slot.
- Transpose: Shift the playing range on the keyboard up and down.
- The slider adjusts the volume of the slot.
EDIT PAGE - LAYER I & II
SOUND
SHAPE
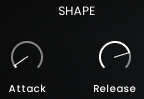
- Attack: Adjust the attack time of the loaded sound in ms.
- Release: Adjust the release times of the loaded sound in ms.
MIX
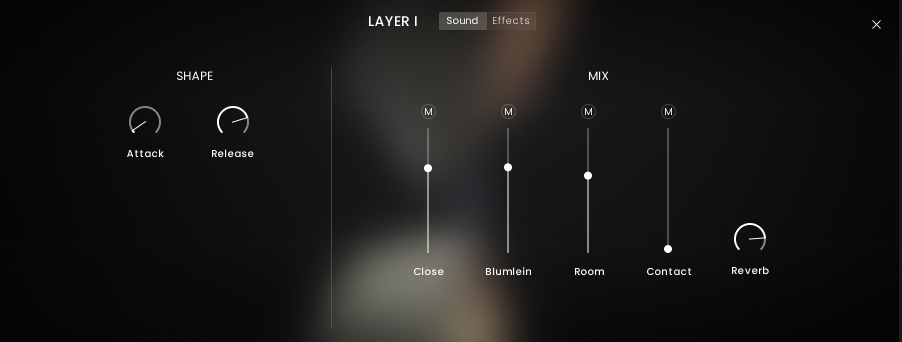
Each sound was recorded with four different mic positions and can be mixed together individually.
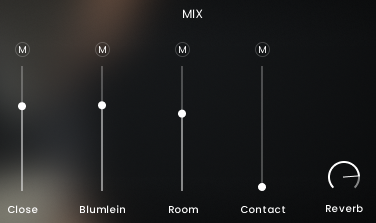
- Close: Close mics for a rich and detailed sound.
- Blumlein: Mounted inside the physical structure, th Blumleins' stereo image is known for great spatial realism with a strong center image.
- Room: The Room mics captured the natural sound of the sculpture in the room.
- Contact: The contact mics captured the direct vibrations of the sampled surface, adding a unique timbre to the mix.
The mute button above each mix position mutes the corresponding mic signal.
The Reverb dial controls the send level for the global Reverb. See 5.5.
EFFECTS
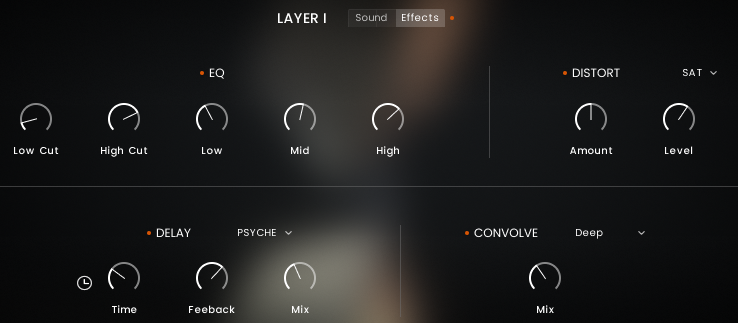
Clicking the red dot next to the Effects Tab will activate & deactivate all active effects.
EQ
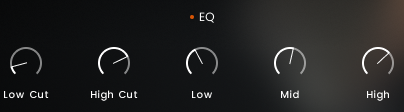
Clicking the EQ sign will mute/unmute the effect.
- Low Cut: The Low Cut is a 2-pole low cut filter, which attenuates frequencies below the cutoff at a rate of -12 dB/octave.
- High Cut: The High Cut is a 2-pole high cut filter, which attenuates frequencies above the cutoff at a rate of -12 dB/octave.
- Low: Boost or trim the low frequencies around 100 Hz by ±18dB.
- Mid: Boost or trim the mid frequencies around 820 Hz by ±18dB.
- High: Boost or trim the high frequencies around 9.8 kHz by ±18dB.
DISTORT
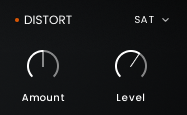
- Type: With the dropdown menu you can choose between two different types of distortion. The more subtle Saturation and Distortion.
- Amount: Adjust the amount to apply more of the Distort Effect to the selected sound source.
- Level: Adjust the volume of the effect.
Clicking the Distort sign will mute/unmute the effect.
DELAY
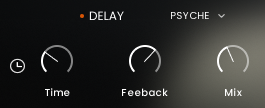
- Type: With the dropdown menu you can choose between three different Delay types. Psyche, Replika and a Basic Delay.
- Feedback: Adjust the Feedback amount for the delay effect.
- Time: Adjust the delay time in ms, or by clicking the clock button synched to the host tempo in note length values (8th, 16th etc.).
- Mix: Adjust the Mix volume of the effect.
Clicking the Delay sign will mute/unmute the effect.
CONVOLVE
Convolve is a colvolution reverb with seven different impulse responses.
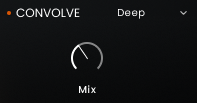
- Clicking the drop down menu will let choose between the seven differen impulse responses for the convolution reverb.
- The Mix knob adjusts the volume of the effect.
- Clicking the Convolve sign will mute/unmute the effect.
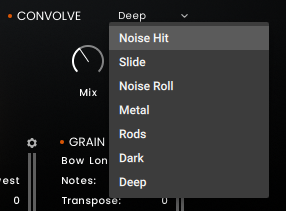
Available impulse responses:
- Noise Hit
- Slide
- Noise Roll
- Metal
- Rods
- Dark
- Deep
EDIT PAGE - ARP I & II
ARP
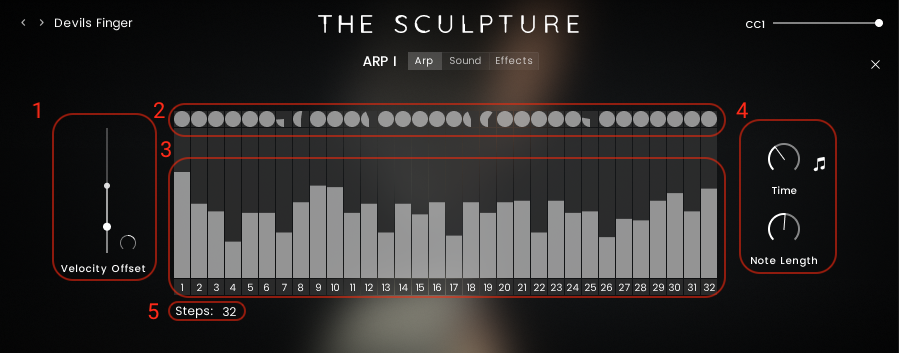
- Velocity: Set the velocity for the Arp.
Offset: The Offset sets the velocity for the maximum mod wheel position CC01=127. In nutral - twelve o'clock position - there is no offset. Any offset to the left will lower the velocity the more the mod wheel is moved up. Any offset to the right will increase the velocity the more the mod wheel is moved up. - Chance: You can set a percentage for each step as to how likely it shell be for the step to be played. A full circle represents 100% chance, a half circle will give you a 50% chance of playing and so on.
- ARP: Set the velocity for each step.
- Time: Set the step time of the arp by ms or synched to host tempo.
Note Length: Set the note length of each step. - Steps: Adjust the total number of steps for the arp.
SOUND
See 5.2.1.EFFECTS
See 5.2.2.EDIT PAGE - GRAIN
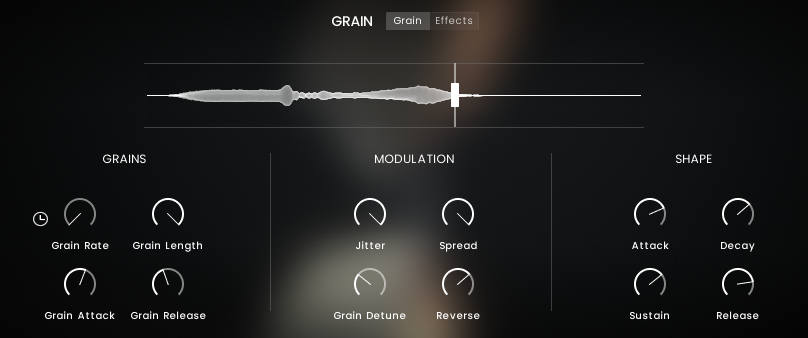
The GRAIN engine opens the door to granular synthesis. Granular synthesis is a form of synthesis based on a process called granulation. Granulation involves breaking down an audio sample into tiny segments of audio called “grains,” typically between 1 and 100 milliseconds in length. A granular synth allows the user to manipulate these grains, transforming the original sample in weird and wonderful ways.
GRAIN

You can drag the bar to mark the position the grains shell be taken from.
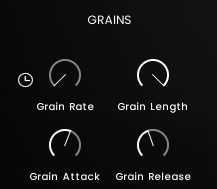
- Grain Rate: Adjust the time interval (rate) in which a grain is played back. With the clock symbol you can switch between ms or have the rate synced to host tempo.
- Grain Length: Adjust the length of each grain.
- Grain Attack: Adjust the attack of each grain.
- Grain Release: Adjust the release of each grain.
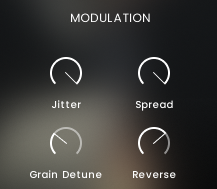
- Jitter: Jitter spreads the bar around the set position in the waveform, so there is more variation and not the identical grain is repeated.
- Spread: Distributed the grains across the stereo field.
- Grain Detune: Adjust the detune of the grains.
- Reverse: Adjust the percentage of played grains in reverse.
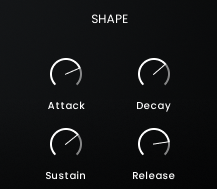
- Attack: Adjust the attack of the entire grain sound.
- Decay: Adjust the decay of the entire grain sound.
- Sustain: Adjust the sustain of the entire grain sound.
- Release: Adjust the release of the entire grain sound.
EFFECTS
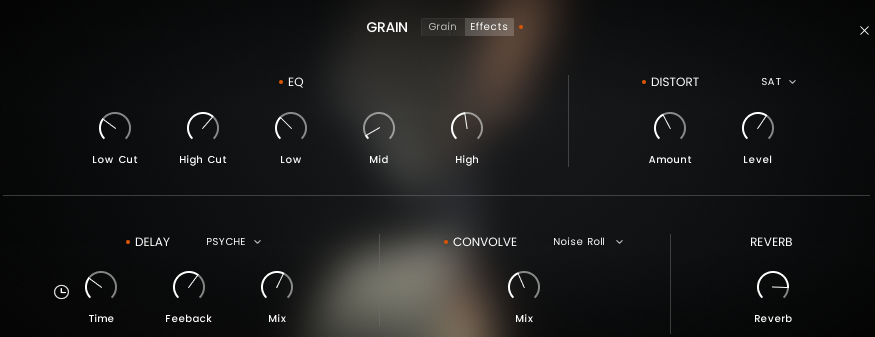
Besids the already familiar effects (see 5.2.2.), the grain engine has an additional reverb send effect.
EDIT PAGE - GLOBAL
EFFECTS
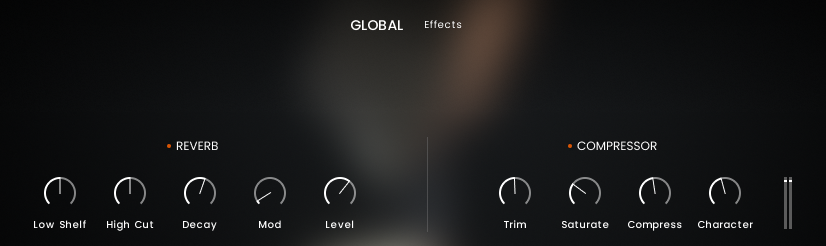
- Low Shelf: Attenuates low-frequency content of the reverb effect by applying a low-shelf filter in the range of 0 dB to -24 dB. Turning the control to the left decreases the attenuation. Turning the control to the right increases the attenuation. Turning the control fully to the left switches the filter off.
- High Cut: Attenuates high-frequency content of the reverb effect by applying a high-cut filter in the range of 90 kHz to 1 kHz. Turning the control to the left increases the attenuation. Turning the control to the right decreases the attenuation. Turning the control fully to the right switches the filter off.
- Decay: Adjusts the length of the reverb, or reverb time. Turning the control to the right changes the reverb time from short to long.
- Modulation: Adjusts the amount of movement added to the reverb sound by changing internal parameters of the reverb over time. Turning the control to the right changes the movement of the reverb from lush to strongly detuned sounds.
- Level: Adjust the volume of the reverb effect.
Clicking the effect name will activate/de-activate the effect.
- Trim: Adjust the input gain feeding the compressor.
- Saturate: Mild Mode. Adds coloration to the signal whilst retaining a clean sound.
- Compress: Determines the amount of compression applied to the input signal. The higher the value, the more compression is applied to the input signal.
- Character: Fat - Emphasizes low and high frequencies.
- Meter: The volume meter shows the attenuation of the compressor.
Clicking the effect name will activate/de-activate the effect.
PRESET BROWSER
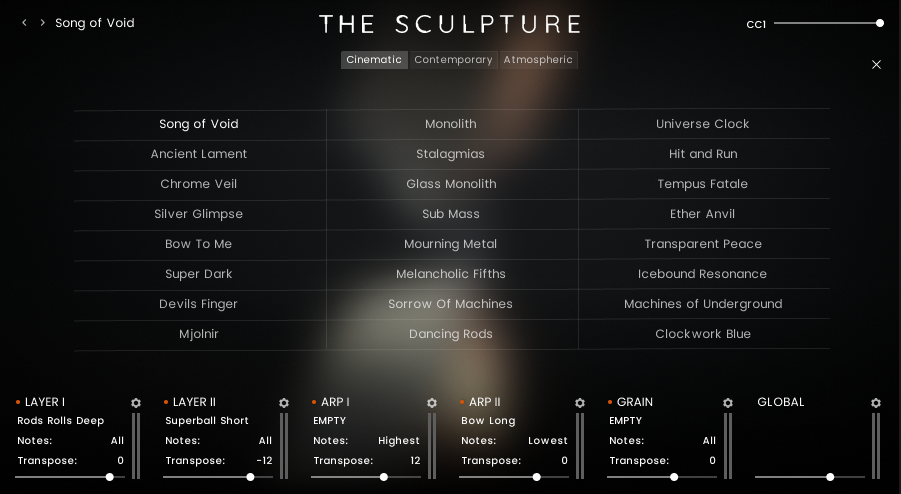
The Preset Browser is structured into three different categories:
- Cinematic: general-purpose cinematic underscording.
- Contemporary: avant-gard colors, more attention drawing than the cinematic category.
- Atmospheric: subtle ambient presets, very sparse usage of percussive articualtions.
Browse through the three categories using the three category Tabs at the top, select a Preset of your choice and then close the Preset Browser using the "X" button in the upper right side corner.
THE SCULPTURE - INSTRUMENT
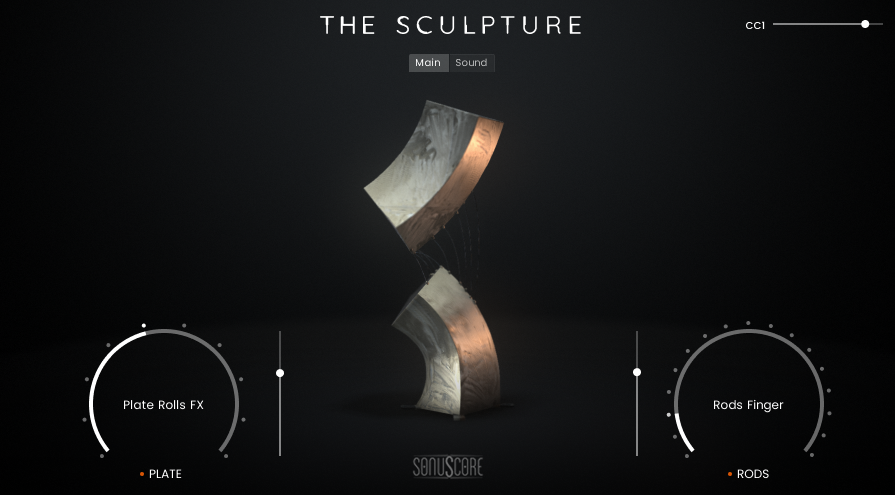
The Sculpture - Instrument let's you play up to two sounds at the same time.
To the left you'll find all the sounds produced on the plates of the sculpture. Simply move the slider up and down to dial through the available sound sources. Mute/Unmute the Layer by clicking the Plate button. Adjust the Volume of the layer with the slider to the right.
To the right you'll find all the sounds produced with the rods of the sculpture. Simply move the slider up and down to dial through the available sound sources. Mute/Unmute the Layer by clicking the Rods button. Adjust the Volume of the layer with the slider to the left.
Short articulations react to note velocity while the long articulations can be played dynamically using the mod wheel (CC01).
SOUND
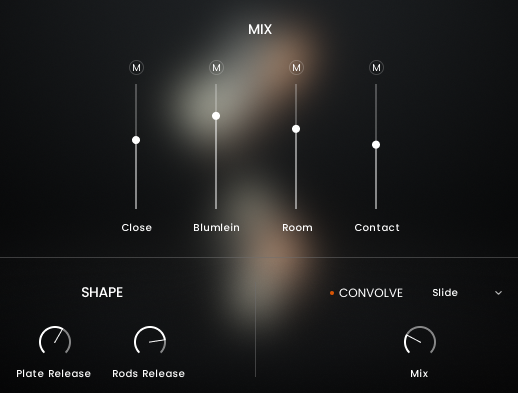
MIX
Each sound was recorded with four different mic positions and can be mixed together individually.
- Close: Close mics for a rich and detailed sound.
- Blumlein: Mounted inside the physical structure, th Blumleins' stereo image is known for great spatial realism with a strong center image.
- Room: The Room mics captured the natural sound of the sculpture in the room.
- Contact: The contact mics captured the direct vibrations of the sampled surface, adding a unique timbre to the mix.
The mute button above each mix position mutes the corresponding mic signal.
SHAPE
- Plate Release: Adjust the release time of the loaded sound in ms.
- Rods Release: Adjust the release time of the loaded sound in ms.
CONVOLVE
See 5.2.2.4.CREDITS
Product Concept and Design: SONUSCORE: Jonas Schüsselin, Moritz Sasowski, Luka Swoboda, Tilman Sillescu
Project Lead: Luka Swoboda, Jonas Schüsselin
Recording: Jonas Schüsselin, Moritz Sasowski
Sample Editing: Jonas Schüsselin, Luka Swoboda
Preset Design: Jonas Schüsselin, Moritz Sasowski
Kontakt Scripting: Luka Swoboda, Stefan Kemler, Jonas Meyer, Mathias Vatter (Built with cksp)
NKS Implementation: Stefan Kemler
User Interface Design: Benedikt Huster, Luka Swoboda, Jannic Böhme (Figma's Simple Design System UI Kit)
Artwork: Jannic Böhme, Benedikt Huster
Marketing: Benedikt Huster, Tobias Kunz, Jannic Böhme, Nadja Demmler, Felix Möbius, Louisa Wolf, Zoé Friedbacher, Russ Hughes
Videos: Nadja Demmler, Tilman Silescu, Benedikt Huster, Jonas Schüsselin, Moritz Sasowski, Nils Wagner, Malik Ouambo, Martin Wiecorek
Quality Assurance: Tilman Sillescu, Stefan Kemler, Simon Schrenk, Jonas Meyer
Manual: Simon Schrenk
Special Thanks
Sculptor: Klaus Gündchen